Interface Overview
This is the guide about Poindeo’s editing interface: understand canvas, timeline, and sidebar tools for efficient video creation.
Poindeo Editing Interface Overview
Poindeo is an online video editor that enables you to create engaging videos with smooth zoom effects, screen recording, audio addition, rich background, and more. Whether you’re creating product demos, tutorial guides, or educational videos, Poindeo helps you achieve your goals quickly.
This guide provides a comprehensive overview of the editing interface, including the tools sidebar, canvas area, timeline, and export controls.
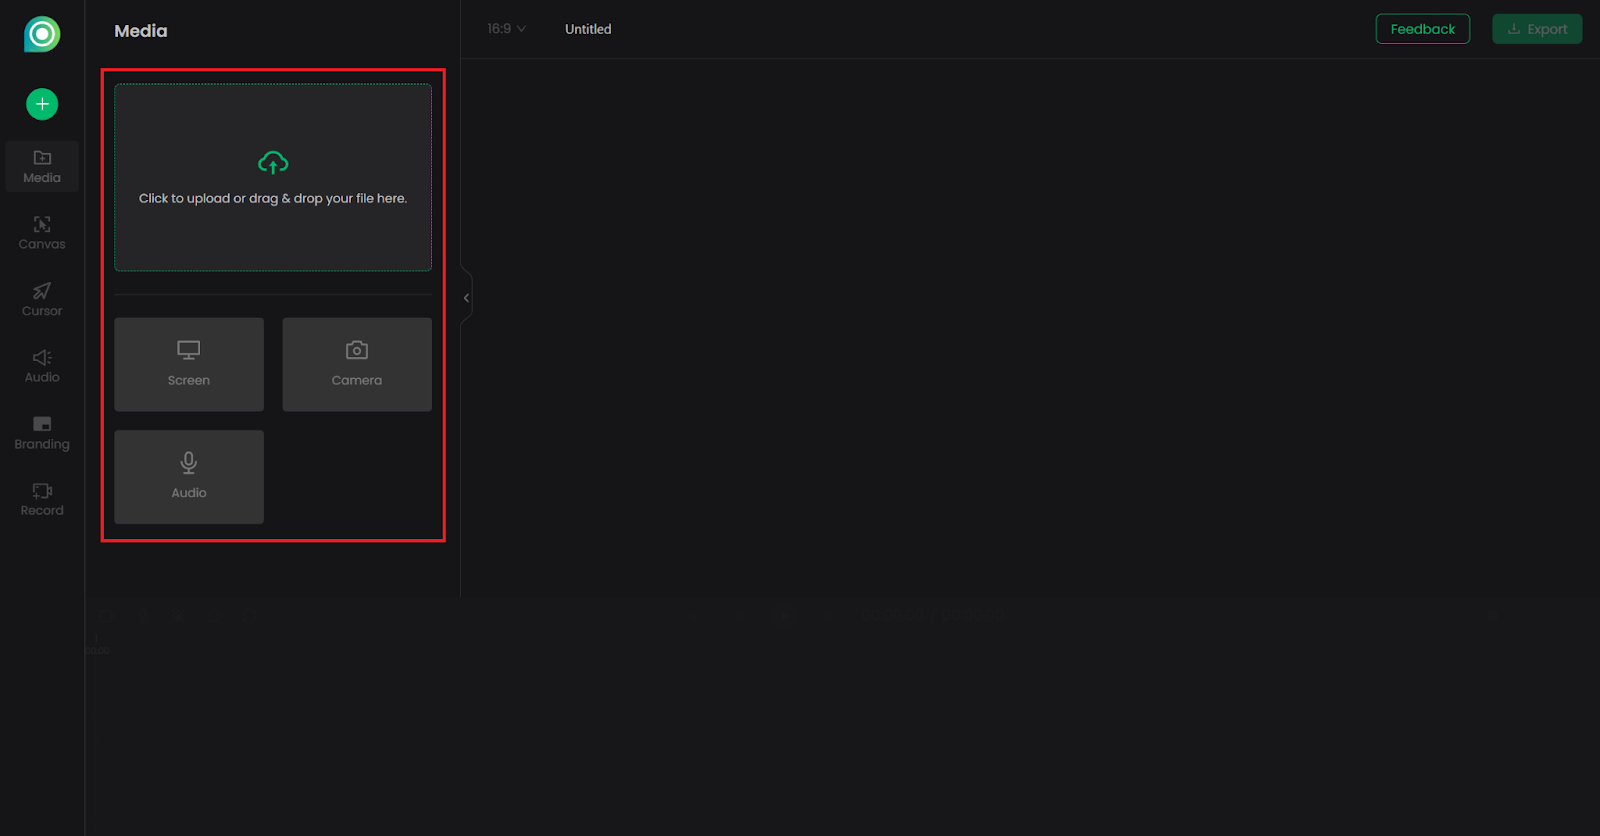
Before Uploading Files
When opening the Poindeo editing page, you can click the Add button or drag & drop files (videos, images, or PDFs) directly. Or directly record the screen, camera, or audio if needed.
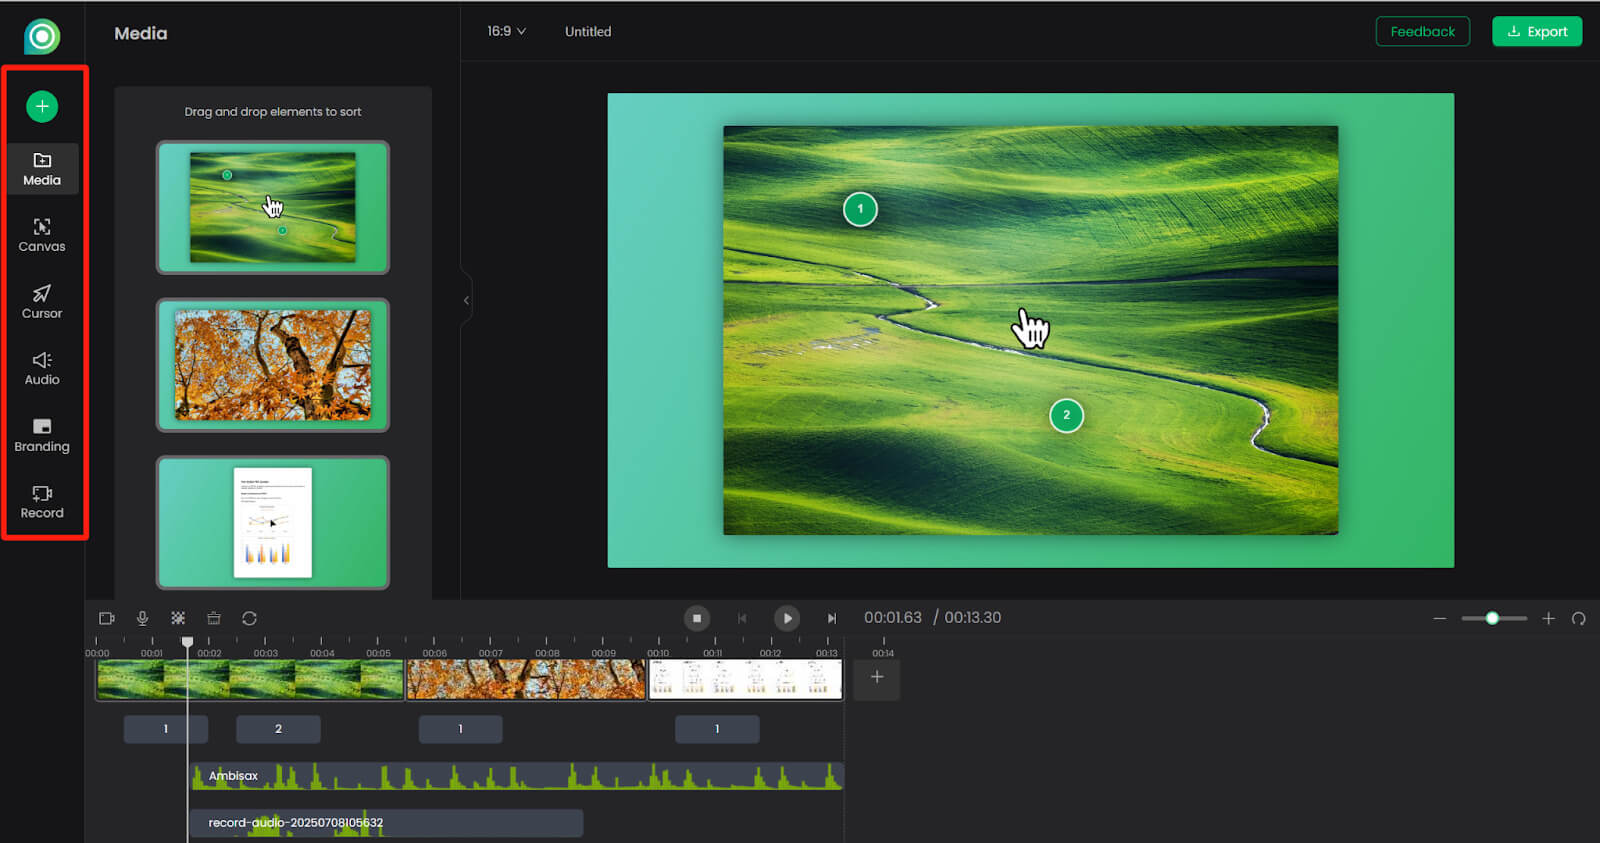
Tools Sidebar
Once files are uploaded, the left sidebar is available. It contains six core editing tools: Media, Canvas, Cursor, Audio, Branding, and Recording.
Media
In Media, you can reorder files via drag-and-drop or download/delete individual files.
Canvas
After the first upload of files, Canvas automatically displays your files with padded backgrounds - an uploaded file is layered atop a background image. You can then customize backgrounds, padding styles, and video speed.
Cursor
When clicking points on the file to add zoom effects, you can customize zoom point visuals in Cursor - adjust whether to show points drawing, point clicks animation, customize cursor size & shape, and zoom point size & color.
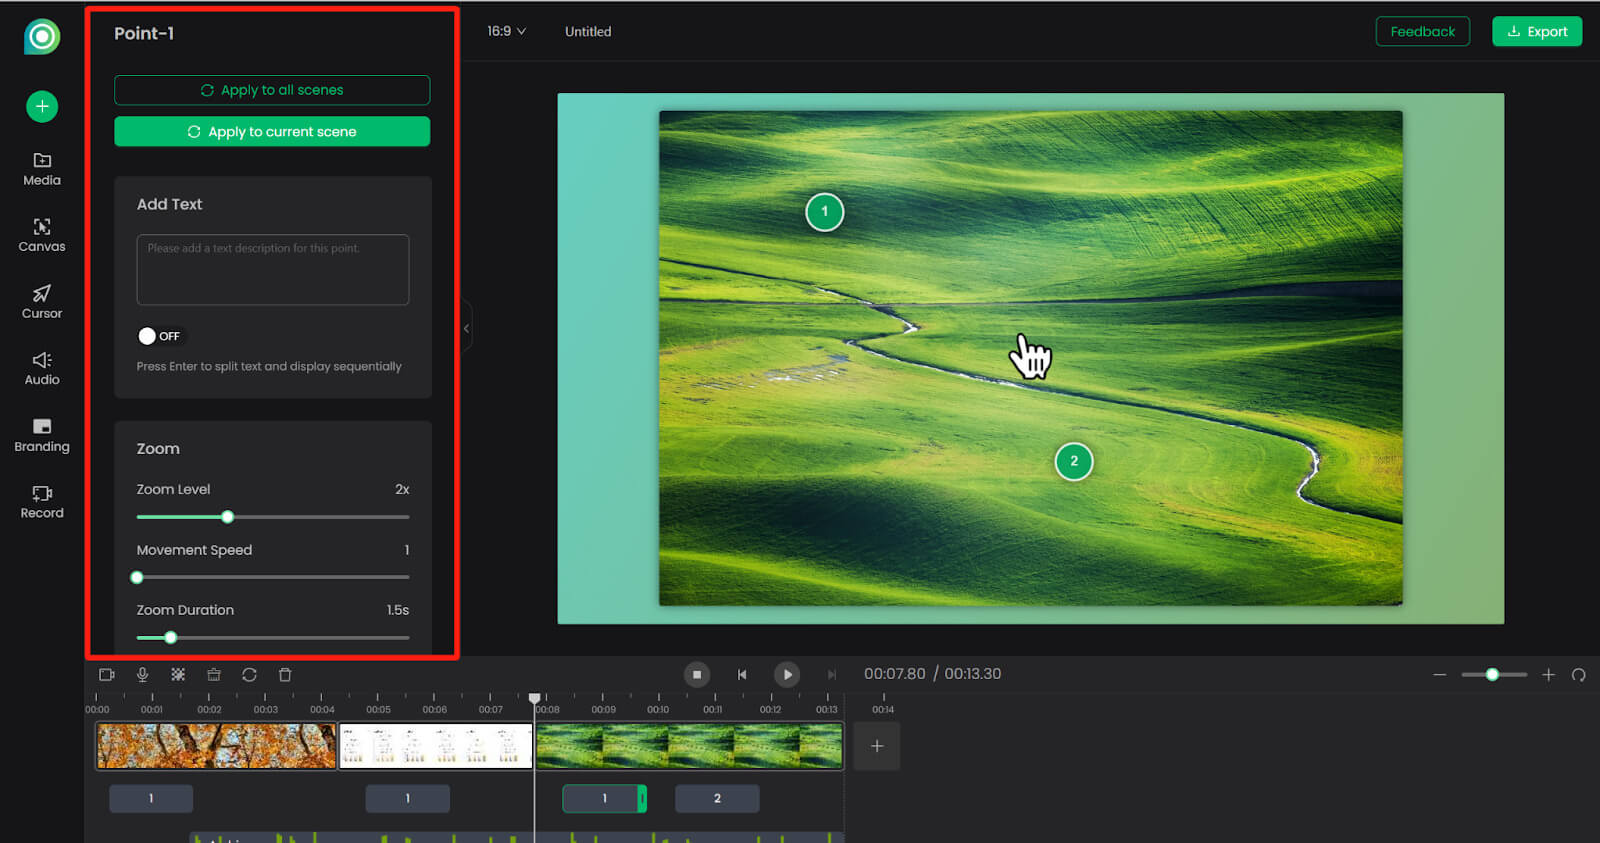
What is Poindeo Zoom Point?
A zoom point is a dynamic marker placed on an uploaded image or any frame of a video. When a point is created, it creates a targeted zoom effect to highlight details while automatically triggering the Point editing panel for precise control - add text description, adjust zoom level, movement speed, and more.
Audio
Add background music from the media library here. You can also upload a local audio file or record microphone input directly to the timeline.
Branding
If you need to add watermarks to protect copyright or maintain branding consistency, here you can add the brand logo and text to your creation. Then adjust the watermark position and text settings like font, style, and color.
Recording
Record your screen with the camera and microphone, or record only the camera or the microphone. You can also add voiceover narration to images or PDFs with zoom points.
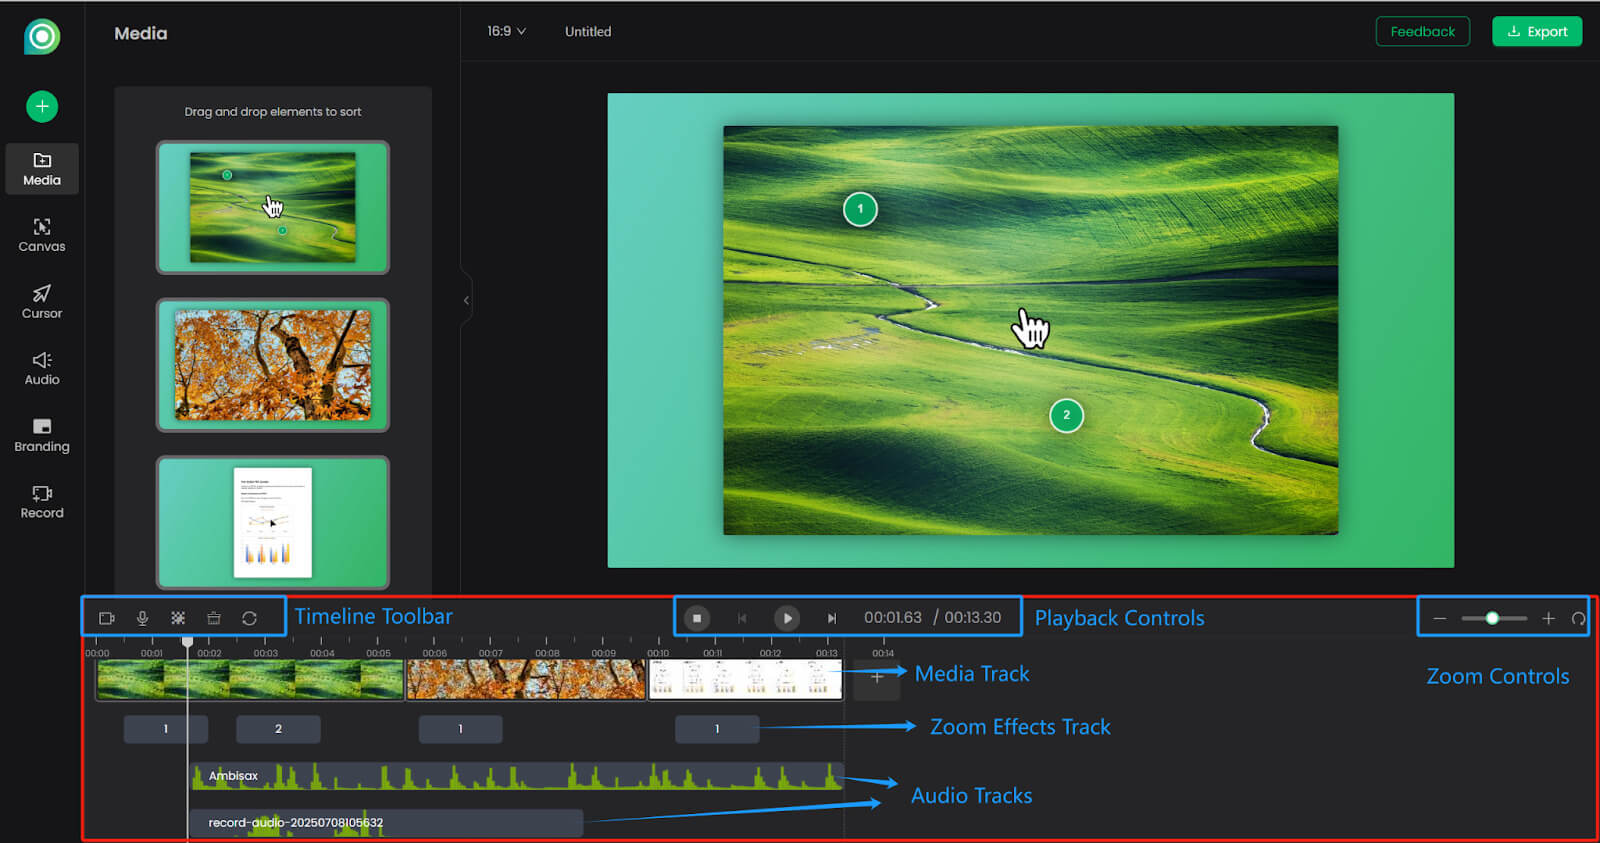
Timeline Control Panel
Poindeo’s timeline features three functional areas:
-
Track Area: Organizes your project vertically. The media track displays all uploaded files. The zoom effects track shows applied Ken Burns effect sequences for each file. Audio tracks support adding multiple sound layers.
-
Playback Controls: Navigates your project precisely. Press the Play/Pause or Stop button to control the file’s playback.
-
Timeline Toolbar: Here are quick editing functions, including voiceover on images/PDFs, audio recording, video splitting, image mosaic, zoom points deleting, and zoom controls on the right for adjusting the timeline view. This integrated panel streamlines your editing workflow within the timeline environment.
Canvas Area
The central workspace provides real-time previews of all editing operations. Click the Play button below to preview your creation.

Additional Settings
From the top menu bar, you can change the aspect ratio for one file or all files, and name your creation.

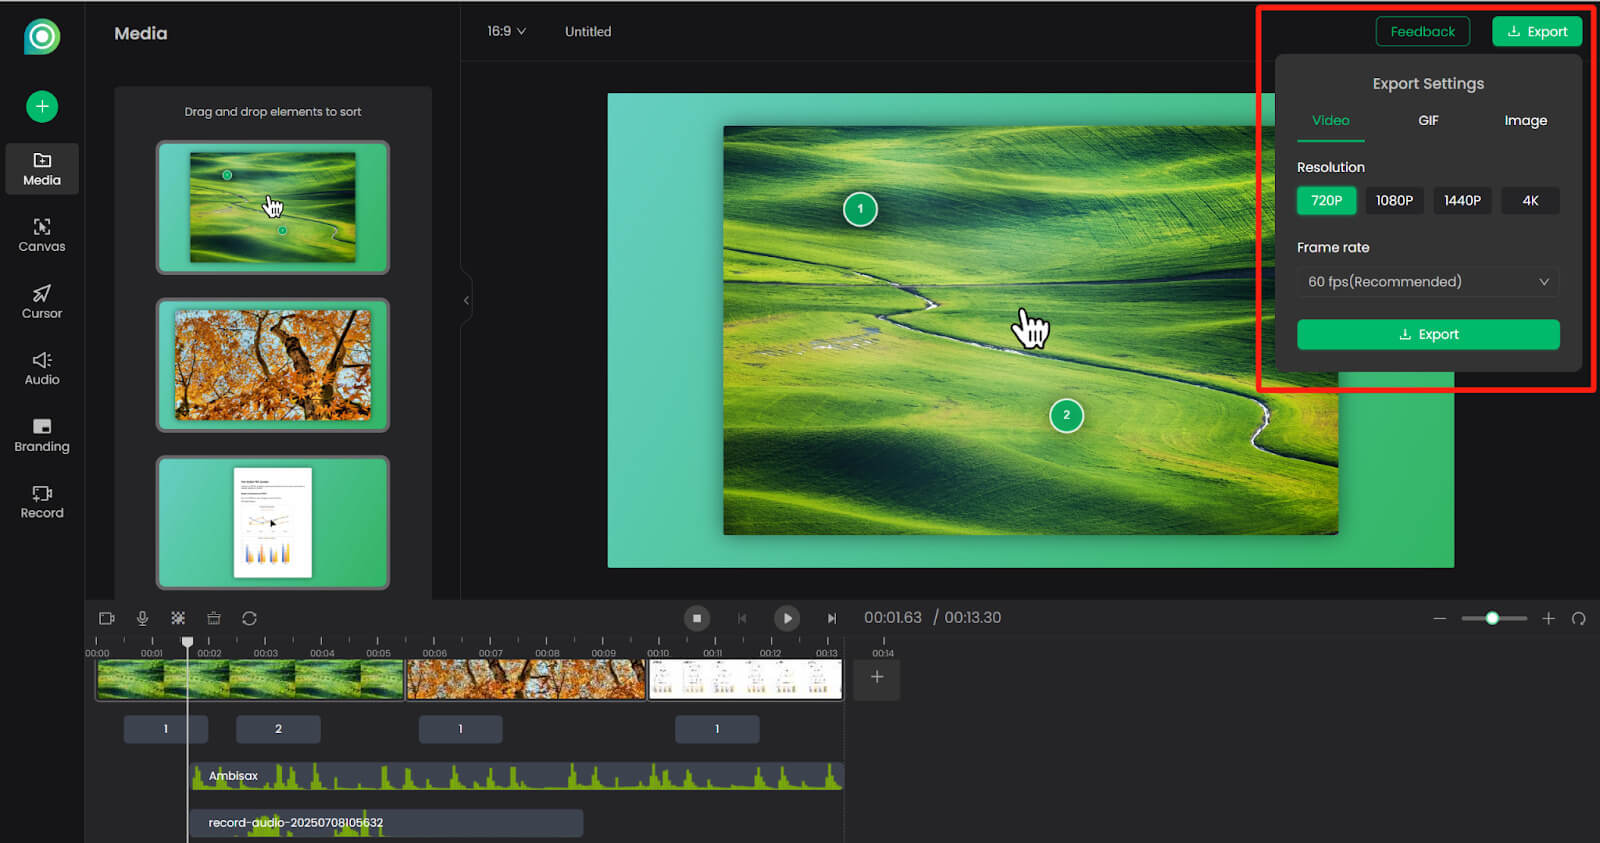
Export Panel
When everything is done, choose a file type to export on the top right. Configure video/GIF resolution & frame rate, and select image format.