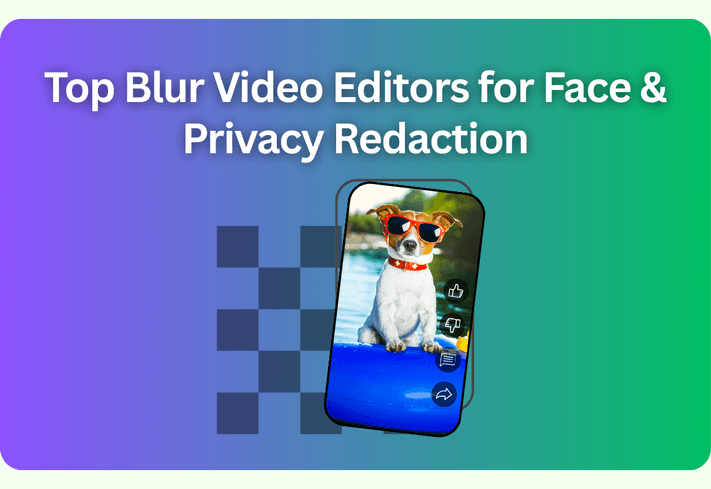
If you need to hide an email, face, account ID, or logo before sharing a screenshot or photo, pixelation (the mosaic effect) is a quick, reliable way to obscure detail. Image pixelation is also a cool effect for pixel art. This guide shows fast methods—Poindeo (browser-based), Photoshop (non-destructive), and simple AI tools—so you can pick the best fit in minutes.
Key Takeaways
- Poindeo is one of the quickest online tools you can pixelate an image and apply the same area and strength across multiple images.
- Photoshop gives fine control via Smart Filters and masks for selected areas or full-frame effects.
- AI tools can auto-detect faces for rapid redaction—use only if the privacy policy fits your needs.
- Privacy note: Pixelation and blur effects both reduce identifiable detail, but neither is guaranteed against modern AI. For sensitive data, validate at 100%–200% zoom, use stronger settings, or consider masking or cropping instead.
How to Pixelate Image with Poindeo
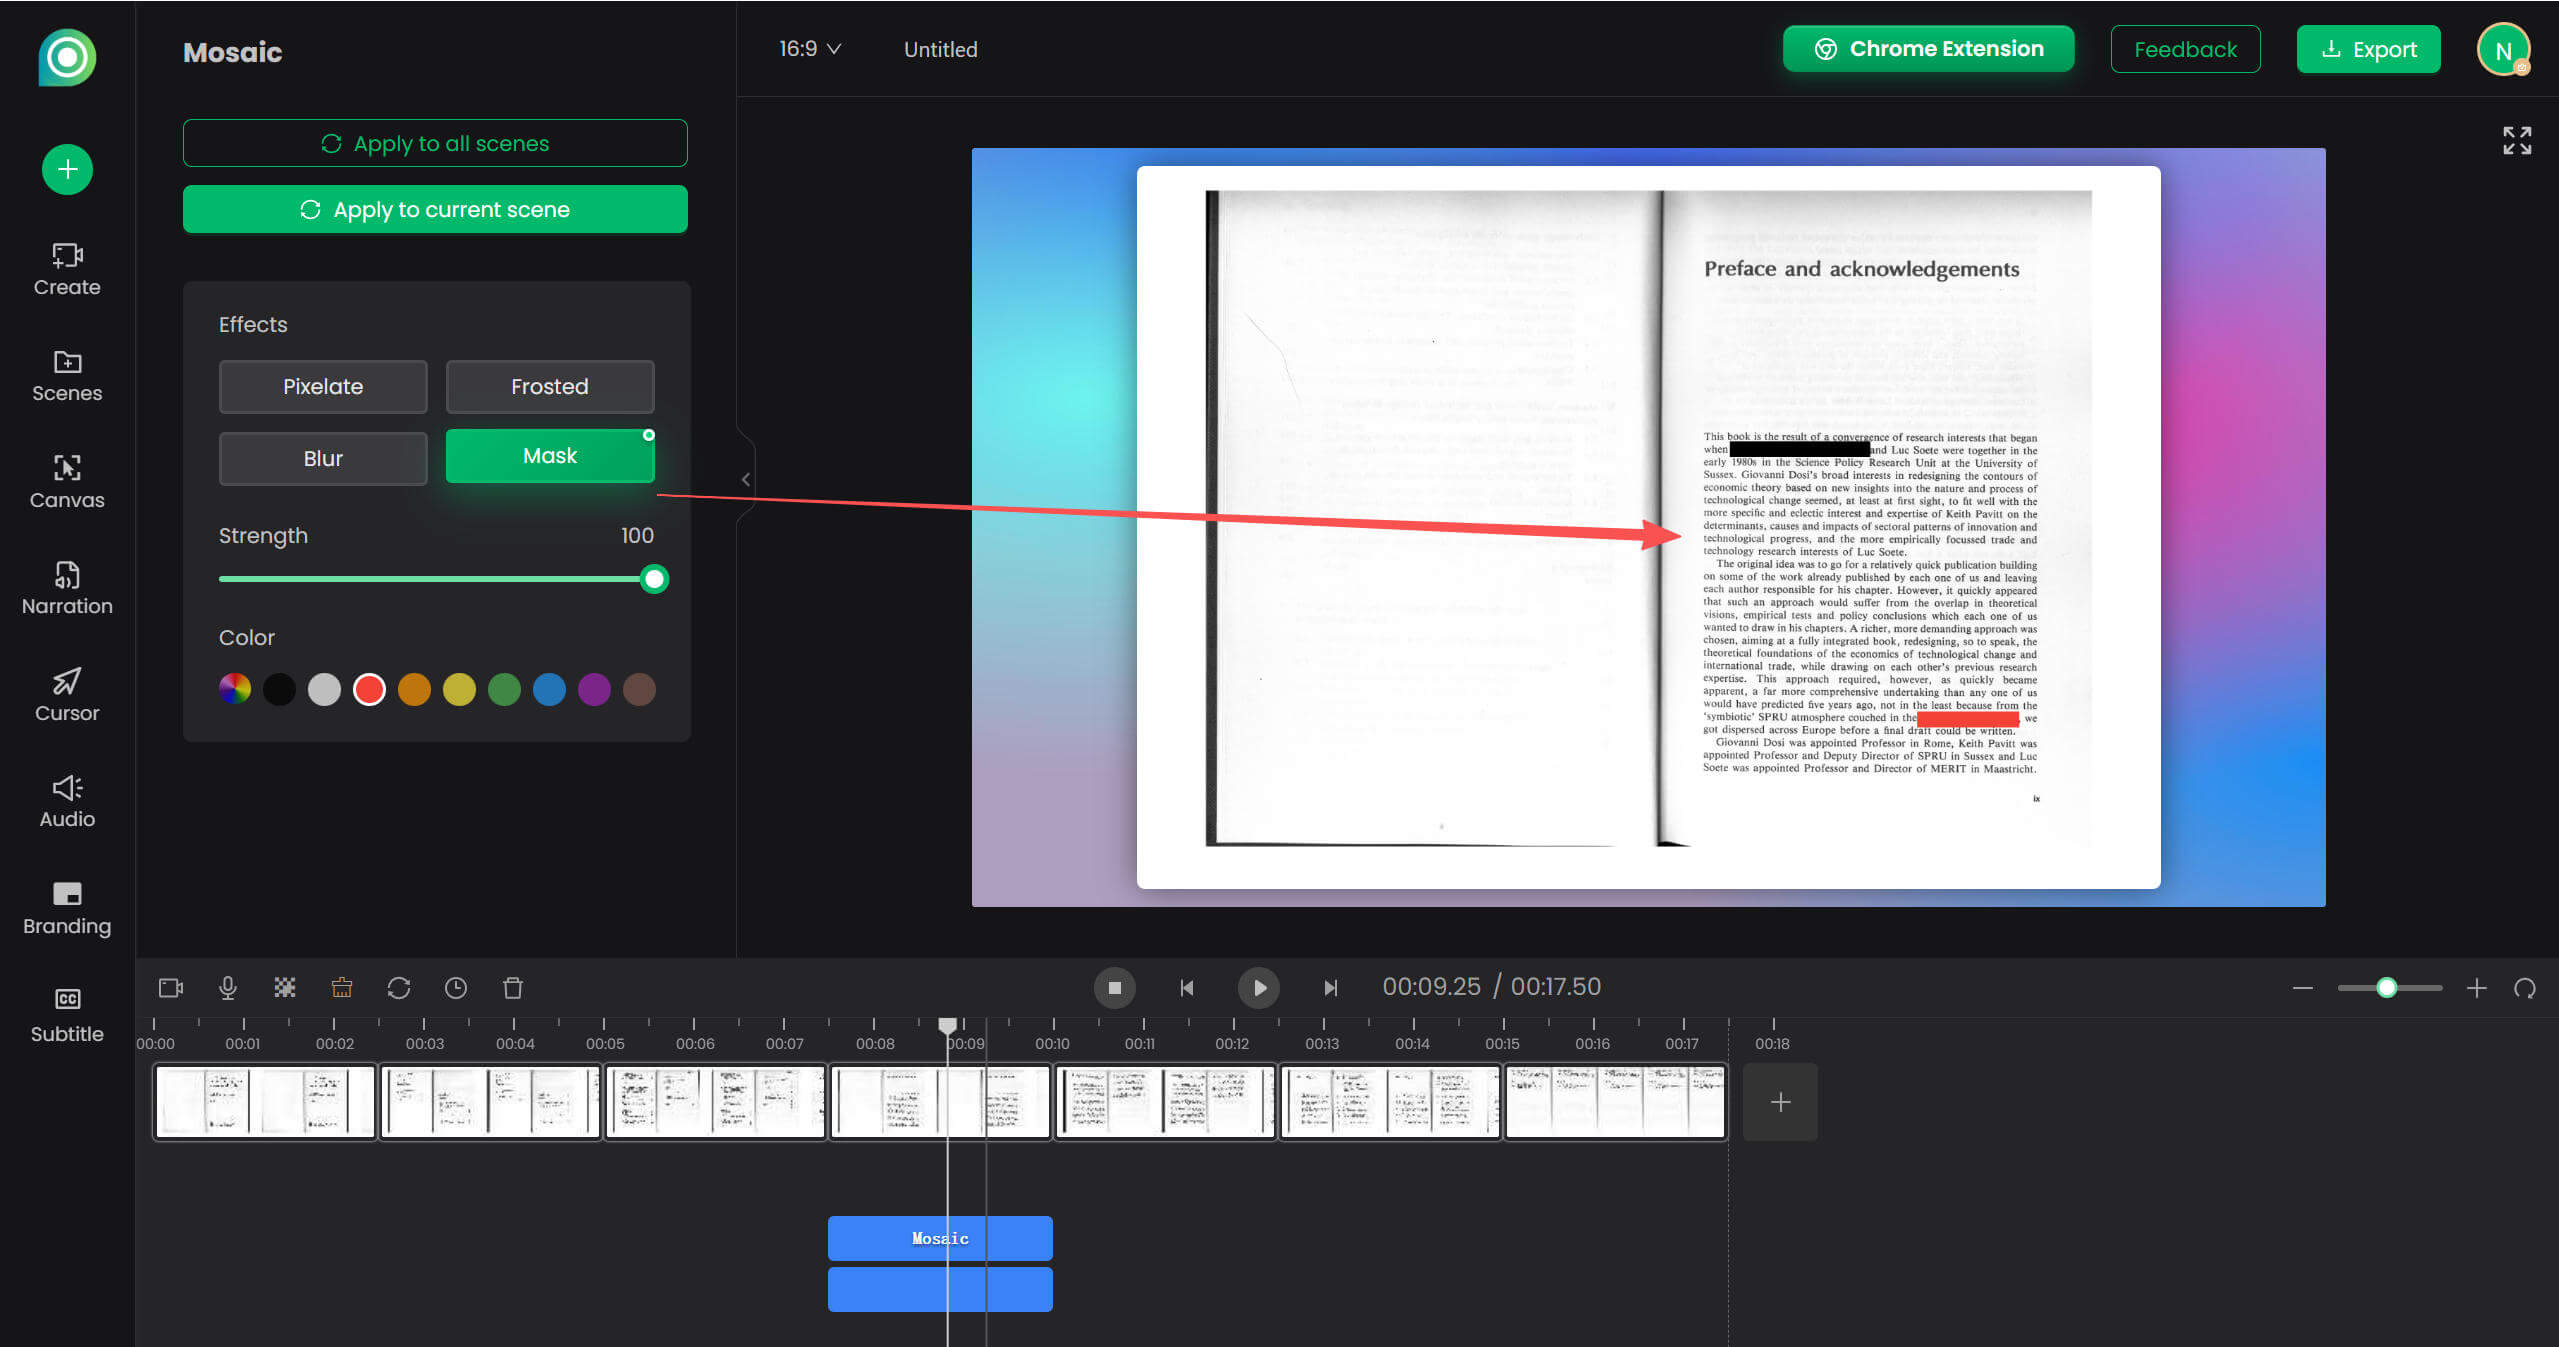
If you need a simple, in-browser method with flexibility , Poindeo’s editing tool supports pixelate, blur, frosted, and mask effects across images, PDFs, and videos. You can pixelate the whole image or the specific part of it. Choose to customize the pixelate area and position on the canvas, or adjust pixelation duration from the timeline.
Its key differentiator here is one-click consistency: define the area and strength once, then apply the same settings across multiple images. Or if text or faces are still readable, you can increase Strength or switch to Mask/Blur/Frosted directly in Poindeo.
Steps for Image Pixelation:
Step 1. Open the Poindeo editor in your browser and upload one or more images.
Step 2. Click the Mosaic icon in the timeline to enable the pixelation tool.
Step 3. On the canvas, click and drag to draw a box over the sensitive area.
Step 4. In the effects panel, change the box effect to Pixelate and adjust Strength. Move or resize as needed.
Step 5. For batches, upload images and click the “Apply to all scenes” button to apply the same area, position, and intensity to multiple images with one click for consistent redaction.

Advantages of Poindeo for Image Pixelation
- Extremely simple and visual workflow. No need to understand layers or filters.
- Fast for privacy redaction. Direct pixelation on canvas.
- Batch consistency with the same pixelation position, size, and intensity. Huge time-saver for image sequences.
- Beginner-friendly with no learning curve and works in browsers.
- Safe data uploads because all data is only stored in your browser.
Disadvantages of Poindeo
- Box-based selection only.
- Harder to refine after applying.
Tips:
- For social or product tutorials, you can later guide attention with zoom and pan effects using the Video Zoomer tool.
- Use Pixelate for UI text/IDs; consider Blur for a softer look, or Mask when you want a stronger concealment.
How to Pixelate an Image in Photoshop
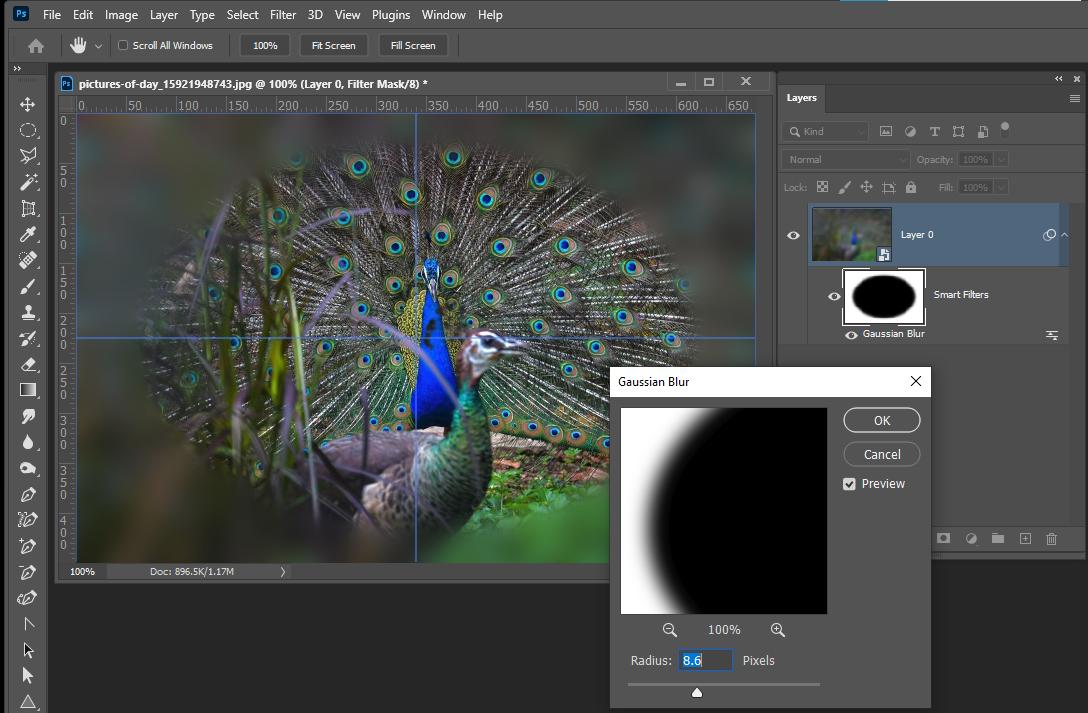
Photoshop is a powerful image pixelator that also lets you target exactly what to hide using the Smart Filters and Layers panel. Smart Filters are fully editable. You can adjust Cell Size or the pixelated area later without starting over by double-clicking the Smart Filter..
Steps to Pixelate Only Part of an Image
- Select an area using the Marquee tool (rectangle) or Lasso Tool (freehand) from the left tools panel.
- Convert the layer to a Smart Object (Layer > Smart Objects > Convert to Smart Object), which is non-destructive editing that you can change the effect later, or remove it anytime.
- Go to Filter > Pixelate > Mosaic and set Cell Size (pixel block size). Larger values create bigger squares and stronger pixelation. Move the slider and preview the result.
- Your image is now pixelated.
![]()
Steps to Pixelate the Entire Image
- Select the layer (or Select > All).
- Filter > Pixelate > Mosaic. Adjust Cell Size based on output size and sensitivity.
Photoshop can also detect a person or object to pixelate background or subject automatically, which suitable for background-only pixelation:
- Click Select > Subject.
- Click Select > Inverse.
- Go to Filter > Pixelate > Mosaic.
If you prefer blur: try Filter > Blur > Gaussian Blur with a higher radius when privacy is more sensitive.
Advantages of Photoshop for Image Pixelation
- Photoshop allows pixel-perfect control over any area. Best for complex images and irregular shapes (not just rectangles).
- Its Smart Filters feature allows editing later and removing anytime.
- Background pixelation is available.
Disadvantages of Photoshop
- More complex steps. Not beginner-friendly.
- Slower for simple tasks and no built-in batch “same position” shortcut.
- Desktop requires installation and higher system resources.
How to Pixelate Image with AI Tools
Lightweight AI tools are also optional for pixelate photo online, especially for face-only redaction. Remember to read each provider’s privacy policy before uploading sensitive media.
Option 1: Cloudinary Pixelate tool
Best for quick full frame pixelation or batch image to pixel art. You can apply a pixelated effect for the whole image, then download one or all.
![]()
Option 2: Blur.me Face Pixelizer
Best for pixelating an image with multiple faces, or smart pixelation for full body, vehicle or license plate. It detects the subjects automatically. Then you can choose the pixelated face effect. Sometimes Application errors happen.
![]()
What Are Use Cases of Pixelating Image
Censored pixelated images are necessary for private, commercial, or educational materials. Here are common use cases:
- Redacting emails, tokens, or IDs in UI screenshots before docs or social posts.
- Hiding faces in internal team photos or customer stories when consent is unclear.
- Concealing unreleased product elements in marketing previews.
- Anonymizing bug reports and support tickets for knowledge bases.
- Preparing tutorial images while keeping private fields invisible.
Frequently Asked Questions on How to Pixelate Image
How does Poindeo’s image pixelation tool compare to Photoshop?
Poindeo is faster for beginners and for applying the same pixelation across many images in the browser. Photoshop offers pixel-level control, non-destructive Smart Filters but complex selections. Choose Poindeo for speed/consistency; choose Photoshop for precision and complex masks.
Pixelate vs blur: which is safer for privacy?
Pixelation can strongly hide text/IDs at larger cell sizes, while a heavy Gaussian Blur can soften facial features more naturally. For higher-risk content, increase intensity and consider a solid mask or cropping.
How to pixelate part of an image quickly?
In Poindeo, draw a box over the sensitive area, set Pixelate, adjust Strength, and export. In Photoshop, make a selection, convert to Smart Object, then Filter > Pixelate > Mosaic so you can re-edit later.
What Cell Size should I use in Photoshop for a face?
Start around 40–60 for high-res photos and increase if any features remain recognizable. Always validate at 100%–200% zoom on the final export size.
Can I pixelate a background but keep the subject clear?
Yes. In Photoshop, Select > Subject, then Select > Inverse to target the background and apply Mosaic. Adjust the Smart Filter mask to refine edges.
How to pixelate images and export directly for social platforms?
Keep UI assets crisp by using PNG where possible; if using JPEG, set higher quality and check the platform’s re-encoding. Poindeo can help resize to your target aspect ratio before or after pixelation.
Conclusion
You’ve seen fast ways to handle how to pixelate an image. Each one has advantages and benefits: an in-browser Poindeo workflow for speed, safe and one‑click consistency, Photoshop for precise control and editable layers, and simple AI options for quick face redaction.
Pick the method that matches your privacy needs and timeline, verify at 100%–200% zoom, and consider stronger settings for sensitive data. If you want to try pixelate images online, you can start from Poindeo for free.