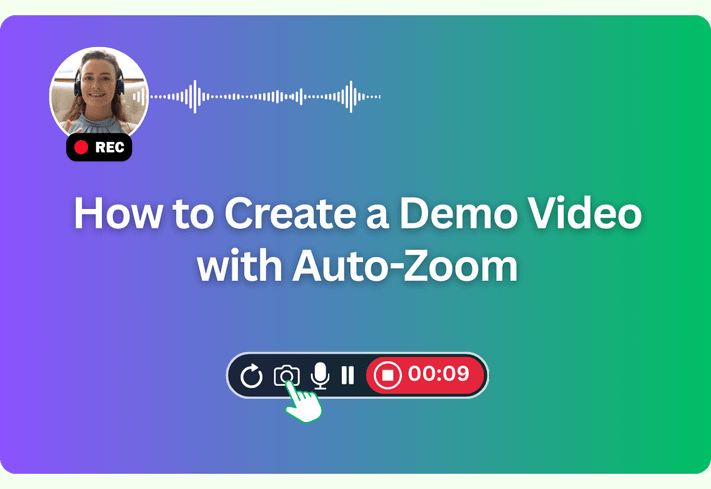
When your product hinges on tiny buttons and subtle states, a standard screen recording won’t cut it. You need an auto zoom demo video that follows the cursor, snaps into the right spot, and makes every click obvious without hours of manual keyframing. This guide walks you through a fast, browser‑friendly workflow—from prep and recording to auto‑zoom tuning, accessibility, and platform‑specific exports for YouTube (16:9), TikTok/Reels/Shorts (9:16), LinkedIn, help centers, and sales outreach.
Why Traditional Screen Recordings Fail (And Why You Need Auto-Zoom)
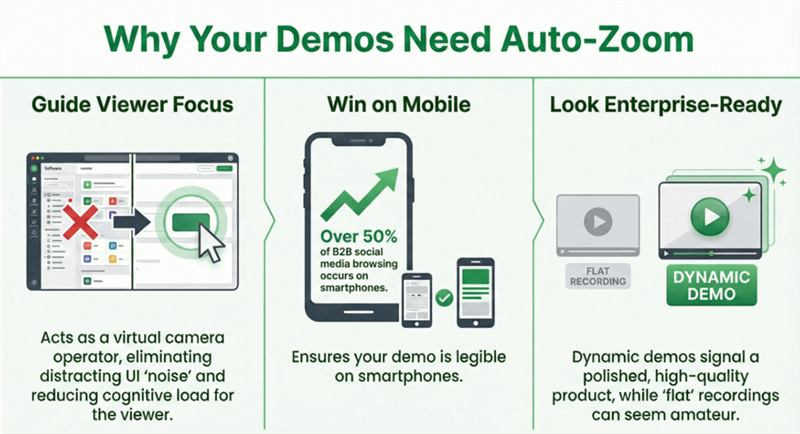
Before we dive into the how, we need to understand the why. Auto-zoom isn't just a "cool effect"; it is a conversion optimization tool.
Direction of Focus
In a complex software interface, there is a lot of "noise"—navigation bars, sidebars, footer links, and data tables. When you zoom in, you are effectively acting as a Virtual Camera Operator. You are telling the viewer exactly where to look. By eliminating the peripheral noise, you reduce the cognitive load on your prospect, making your product feel "easier" to use.
Mobile-First Clarity
Over 50% of B2B social media browsing happens on mobile. If you post a full-screen recording of a web app on LinkedIn or X (Twitter), the UI text becomes unreadable. Auto-zoom solves this by bringing the specific interaction (a click, a toggle, a line of code) into a view that is legible on a 6-inch smartphone screen.
The "Pro" Factor
There is a subconscious link between the quality of your marketing assets and the perceived quality of your code. A "flat" Loom recording says, "We are a startup in beta." A dynamic, auto-zoomed demo says, "We are a polished, enterprise-ready solution."
Manual Keyframing vs. Auto-Zoom
To appreciate the auto-zoom workflow, you first need to understand the painful manual process it replaces.
The Old Way: Manual Keyframing
If you use traditional editors, the process looks like this:
- Record your screen.
- Import the massive file into an editor.
- Every time your mouse moves to a new button, you must manually create a "keyframe."
- You must set the X and Y coordinates for the zoom.
- You must adjust the "easing" (the speed curve) so the move doesn't feel robotic.
- Repeat this 50 times for a 60-second video.
This is what we call "Keyframe Fatigue." It’s why most founders stop making videos. It’s simply too much work.
The New Way: Intelligent Tracking
Modern tools such as Poindeo use built-in motion effects instead of manual editing. The software reads your cursor movements and click positions, then automatically applies smooth zoom transitions. Rather than editing the video frame by frame, you can simply review the result and make minor adjustments if necessary.
How to Create a Demo Video with Auto Zoom: A Complete Step-by-Step Guide
In the past, adding professional camera movements to a recording meant wrestling with heavy desktop software and setting hundreds of manual keyframes. For a busy founder or marketer, this wasn't just a hurdle—it was a full stop.
Enter Poindeo: the browser-based answer to "Keyframe Fatigue."
Poindeo is a next-generation product demo platform designed to turn raw screen captures into cinematic marketing assets in seconds. Unlike traditional editors, Poindeo focuses on automation and aesthetics, allowing you to showcase your software with the same polish as a high-end production studio, but with zero editing experience required.
The Poindeo Advantage: Features That Matter
- Auto-Zoom: Poindeo’s flagship feature. It intelligently tracks your mouse movements and click events, automatically applying smooth, focused zooms to the most important parts of your UI.
- The Poindeo Chrome Extension: No bulky downloads. The lightweight Poindeo Chrome Extension allows you to record any web app directly in your browser. It’s compatible with Windows and Mac, making it the most accessible auto-zoom tool on the market.
- Refined Backgrounds: Easily switch backgrounds and layouts to make your demo look clean and polished on any page.
- Cursor Smoothing: Shaky mouse movements are a thing of the past. Poindeo replaces your raw cursor path with a fluid, professional motion trail.
- Multi-source Recording: Simultaneous Cam + Screen Recording: Poindeo captures your screen and your webcam at the same time
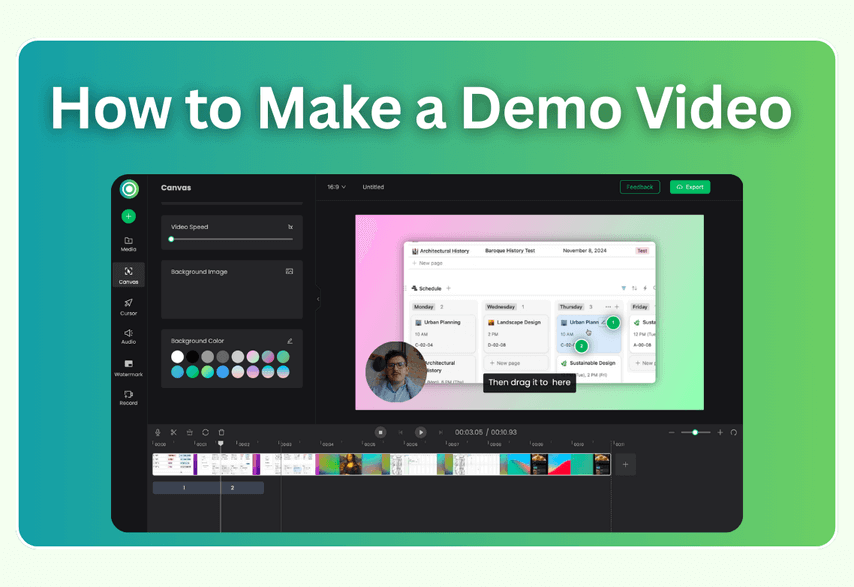
Creating a professional demo with auto-zoom shouldn't be a chore. With Poindeo, the process is streamlined into four simple steps:
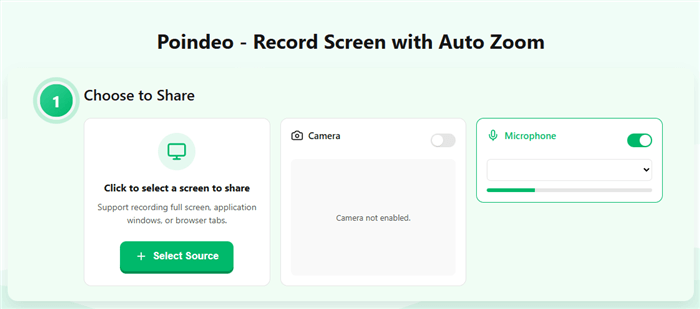
Step 1: Prepare Your "Stage"
Before you hit Record, clean up your environment.
- Clear the Clutter: Hide your browser bookmarks bar.
- Browser Window Size: You don't need to record your entire 32-inch monitor. A standard 1920x1080 window size is perfect.
- The 'Slow Mouse' Rule: When recording for auto-zoom, move your mouse purposefully. Avoid fidgeting or circling the mouse while talking. Move smoothly from Point A to Point B. This helps Poindeo to understand and track where the 'action' is.
Step 2: Capture Your Workflow
Using the Poindeo extension or web recorder, perform your product's "Aha!" moment. Whether it's setting up an automation, generating an AI report, or inviting a team member, keep it under 90 seconds.
Step 3: Apply the Auto-Zoom Engine
Once you have finished recording, you can preview the auto-zoom effect. This feature tracks your cursor movements and clicks on the screen, zooming in at the right moments to highlight these actions. This makes the video easier to watch.
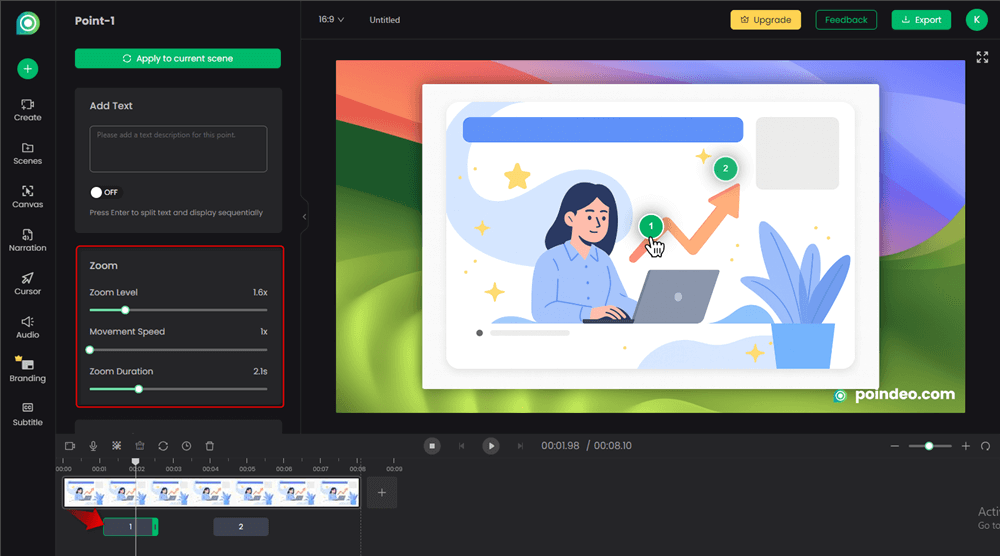
Step 4: Refine the "Cinematics"
Even though the zoom is automatic, you still have full creative control — like a director fine-tuning a shot. With simple sliders and toggles, you can adjust:
- Zoom level — how close the camera moves in
- Movement speed — how fast or slow the zoom transitions feel
- Position mode — whether the camera follows your cursor or stays fixed on a specific area
This lets you dial in the exact look and pacing you want, without touching a single keyframe.
Step 5: Export and Distribute
Don’t just export a generic MP4 and call it done. Different channels require different formats for maximum impact.
- For Social Media: Export a 9:16 vertical version for platforms like TikTok, Reels, and Shorts. (Poindeo automatically re-centers the zoom and focal area for vertical layouts.)
- For Landing Pages & Email: Export a high-bitrate 16:9 MP4 for your website, or a high-quality GIF for email signatures and sales outreach.
3 Pro Strategies for Automated Product Demos That Increase Conversions
Most tutorials tell you how to zoom. They don't tell you when to zoom. To outshine your competitors, use these three advanced strategies:
The "Breadcrumb" Zoom-Out
Often, users zoom in and stay there. This causes the viewer to lose their sense of place.
After showing a detailed action (like filling out a form field), use a slow "zoom-out" to reveal the whole dashboard. This "re-orientates" the viewer, showing them exactly where that feature lives within your ecosystem.
The "Anticipatory" Pan
Instead of jumping from one zoom to another, a "Pan" moves the camera horizontally across the screen.
If you are moving from a sidebar menu to a main content area, use a smooth pan. This creates a "storyline" feel, leading the viewer's eye through the logical progression of your software's workflow.
The "Value" Zoom (Non-Cursor)
Sometimes, the most important thing on the screen isn't where the mouse is—it's the result.
If your software generates a chart or a success message, manually override the auto-zoom to focus on that result for 2 seconds, even if your mouse is already moving elsewhere. This anchors the "Value Proposition" in the viewer's mind.
Why Browser-Based Auto-Zoom Tools Are Better for SaaS Founders in 2026
There are several tools on the market, like Screen Studio (Mac only) or Screen Story. However, for the modern SaaS founder, a browser-based tool like Poindeo offers distinct advantages:
| Feature | Desktop Software (Screen Studio/Story) | Poindeo (Browser-Based) |
| OS Compatibility | Often Mac-only. | Available for Windows, macOS, and as a Chrome extension. |
| Hardware Strain | Can slow down your computer during 4K renders. | Cloud-based rendering; no CPU heat. |
| Speed to Share | Record → Export → Upload → Share. | Record → Edit → Instant Link. |
| Collaboration | Hard to share project files with teammates. | Shared workspaces and cloud storage. |
FAQ: How to Create a Demo Video with Auto Zoom
Q1: Does auto-zoom work on all websites?
Yes. Since Poindeo and similar tools track the cursor coordinates relative to the browser window, the auto-zoom effect works on any web application, dashboard, or site.
Q2: Will auto-zoom make my viewers motion sick?
Only if the movements are too fast or "jittery." This is why "Easing" is important. Poindeo uses smooth acceleration and deceleration curves (Ease-in-out) to ensure the movement feels fluid and natural, much like a professional camera operator.
Q3: Can I turn off auto-zoom for certain parts of my video?
Absolutely. While the "Auto" part is the default, you can usually jump into the timeline and "lock" the camera to a full-screen view for sections where you want to show the entire layout.
Q4: Is auto-zoom better than just a regular screen recording?
For marketing and demos, yes. A regular recording (like a standard Loom) is great for internal communication. But for external marketing, where you need to keep attention and ensure legibility, auto-zoom is superior because it highlights the specific value you are discussing.
Q5: Do I need a high-end computer to create these videos?
If you use a desktop-based editor, yes—rendering 4K video with motion blur and zooms is very CPU-intensive.
Q6: Can I change the aspect ratio after I've recorded?
Yes. One of the best features of Poindeo is the ability to record once and export multiple times. You can record in landscape (16:9) for your website, then toggle to vertical (9:16) for TikTok or Instagram Reels. The auto-zoom will automatically re-center the camera on your cursor so the action is never cut off.