
Adobe Premiere Pro is the industry standard for video editing, offering unparalleled control over every pixel of your project. Mastering essential techniques like a smooth zoom effect is a fundamental skill that separates amateur edits from professional productions. But what if you could achieve those pro results, whether you have five minutes for detailed adjustments or just 30 seconds for a quick animation?
This guide will provide a comprehensive, step-by-step tutorial on how to create a perfect zoom effect in Adobe Premiere Pro using keyframes. Then, for those moments when the professional method feels like overkill, we’ll reveal a surprisingly fast shortcut using a specialized tool called Poindeo.
Here's what you'll learn:
- Different techniques to zoom in on Premiere Pro.
- Step-by-step instructions for each method.
- Tips for achieving smooth and professional-looking zooms.
- Common mistakes to avoid.
- Troubleshooting common zoom-related issues.
Let's dive in!
How to Zoom in on Premiere Pro Using the Scale Tool
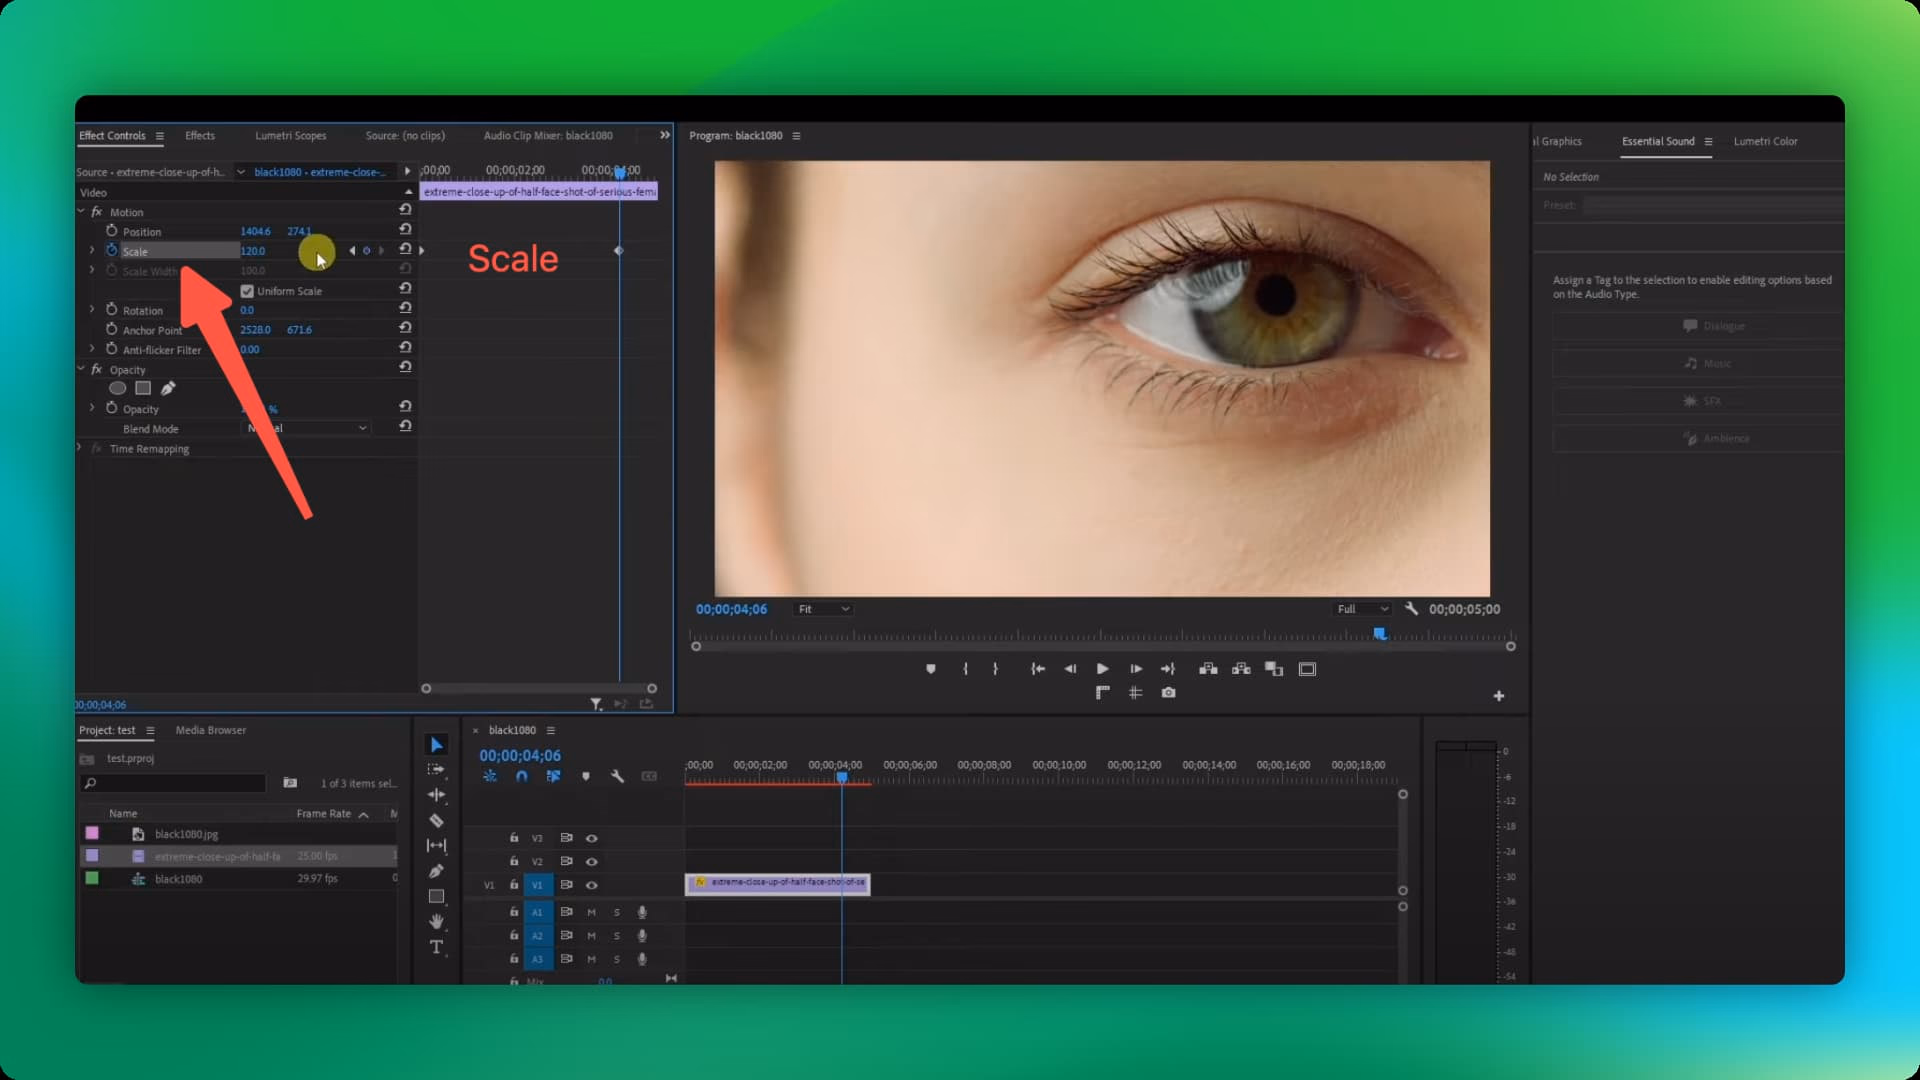
Photo made by Poindeo
Steps:
Step 1: Import your footage into Premiere Pro.
Step 2: Drag your clip onto the timeline.
Step 3: Select the clip in the timeline.
Step 4: Open the Effect Controls panel (Window > Effect Controls).
Step 5: Expand the Motion settings.
Step 6: Locate the Scale property.
Step 7: Increase the Scale value to zoom in. A value of 100 represents the original size, so a value of 150 would be a 50% zoom.
Step 8: Adjust the zoom level over time by setting keyframes. Click the stopwatch icon next to the Scale property to set your first keyframe. Move the playhead to a different point in time and adjust the Scale value again to create a smooth zoom effect.
Video Guide:
Tips:
- Use the Uniform Scale checkbox to maintain the aspect ratio of your video while zooming.
- Preview your zoom in real-time by dragging the playhead in the Program Monitor.
Limitations:
- This method can result in some pixelation if you zoom in too far, especially with lower-resolution footage.
Best for: Quick and easy zooms, especially for beginners.
How to Zoom in on Premiere Pro by Cropping
Steps:
Step 1: Follow Steps 1-3 from the Scale Tool method.
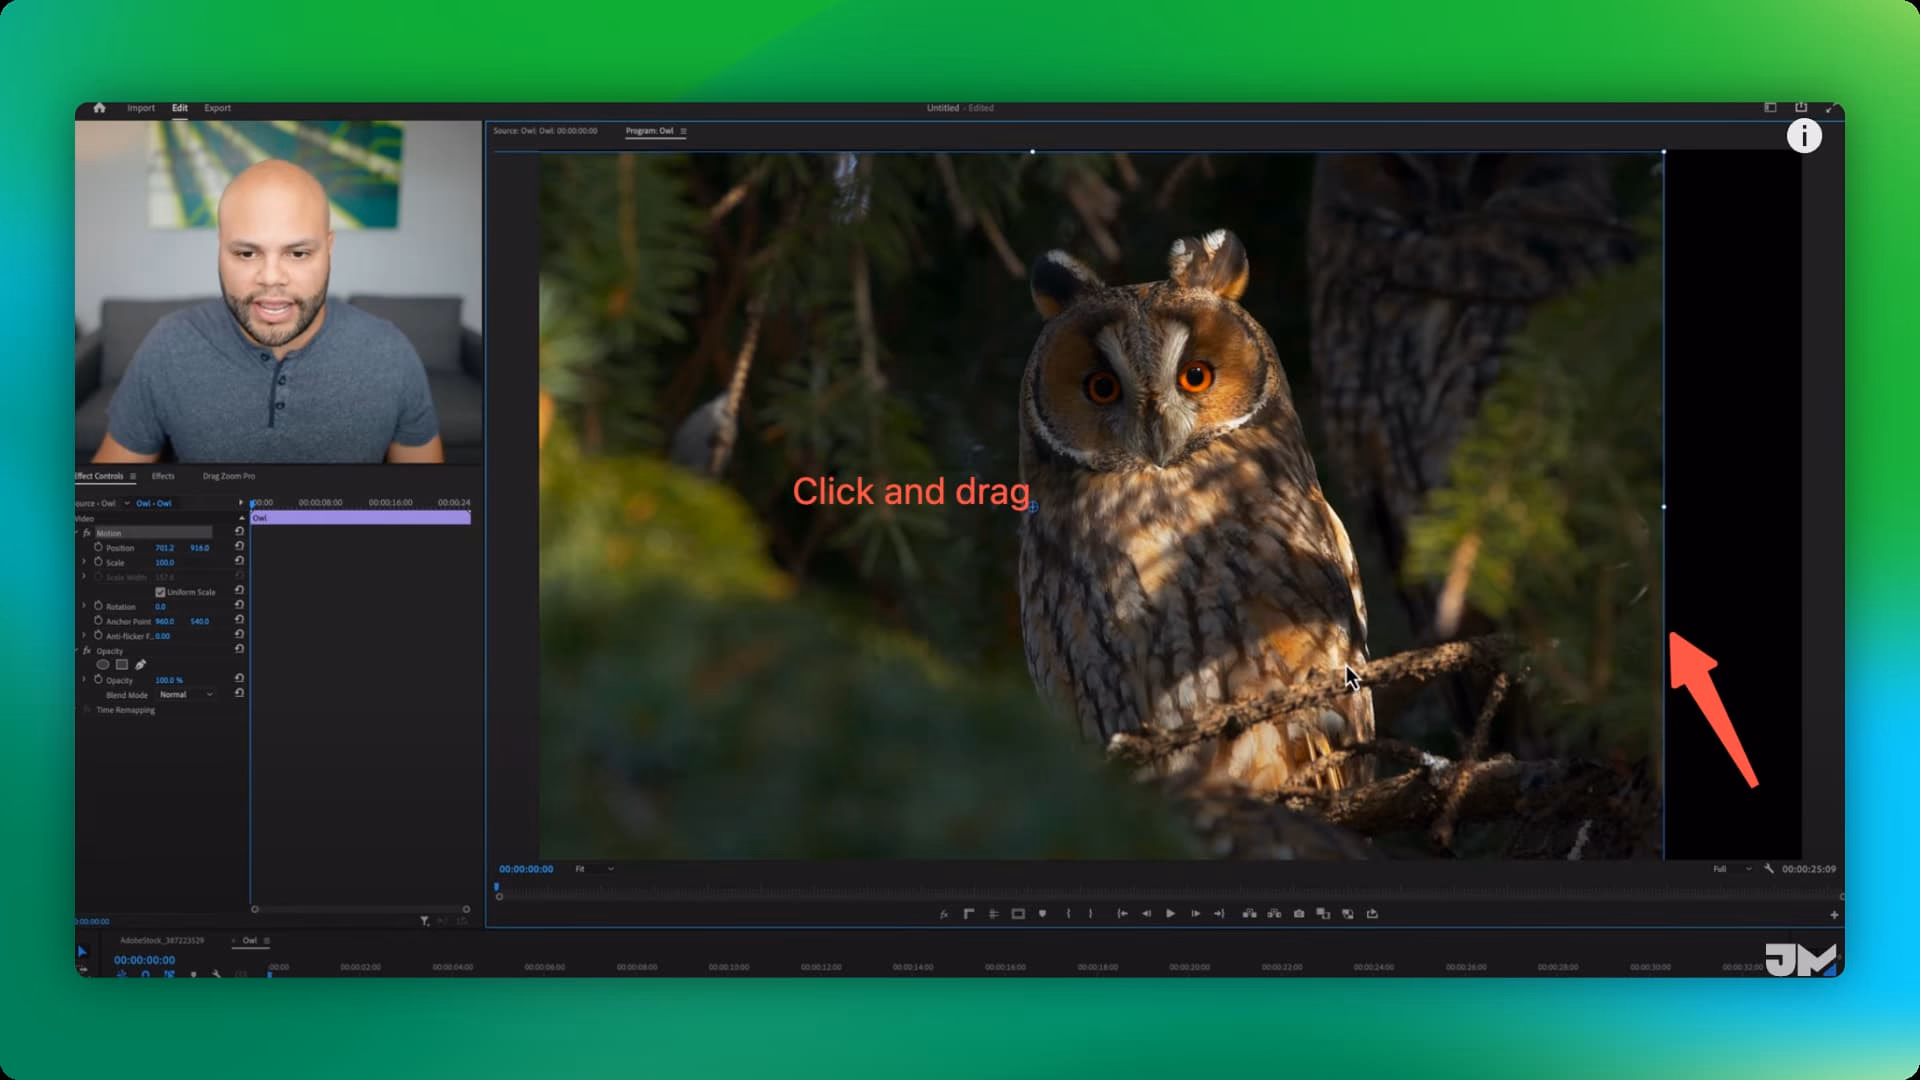
Step 2: In the Effect Controls panel, expand the Motion settings.
Step 3: Use the numerical values or drag the handles in the Program Monitor to crop the edges of your video. This effectively zooms in on the center of your frame.
Tips:
- Hold Shift while dragging the crop handles to maintain the aspect ratio.
- Use keyframes to animate the crop for a more dynamic zoom effect.
Limitations:
- This method removes portions of your video, so it's not ideal if you need to keep the entire frame visible.
Best for: Zooming in on a specific area of interest while removing distractions around the edges.
How to Zoom in on Premiere Pro Using the Transform Tool
Steps:
Step 1: Follow Steps 1-3 from the Scale Tool method.
Step 2: Go to the Effects Panel (Window > Effects).
Step 3: Search for "Transform" in the search bar.
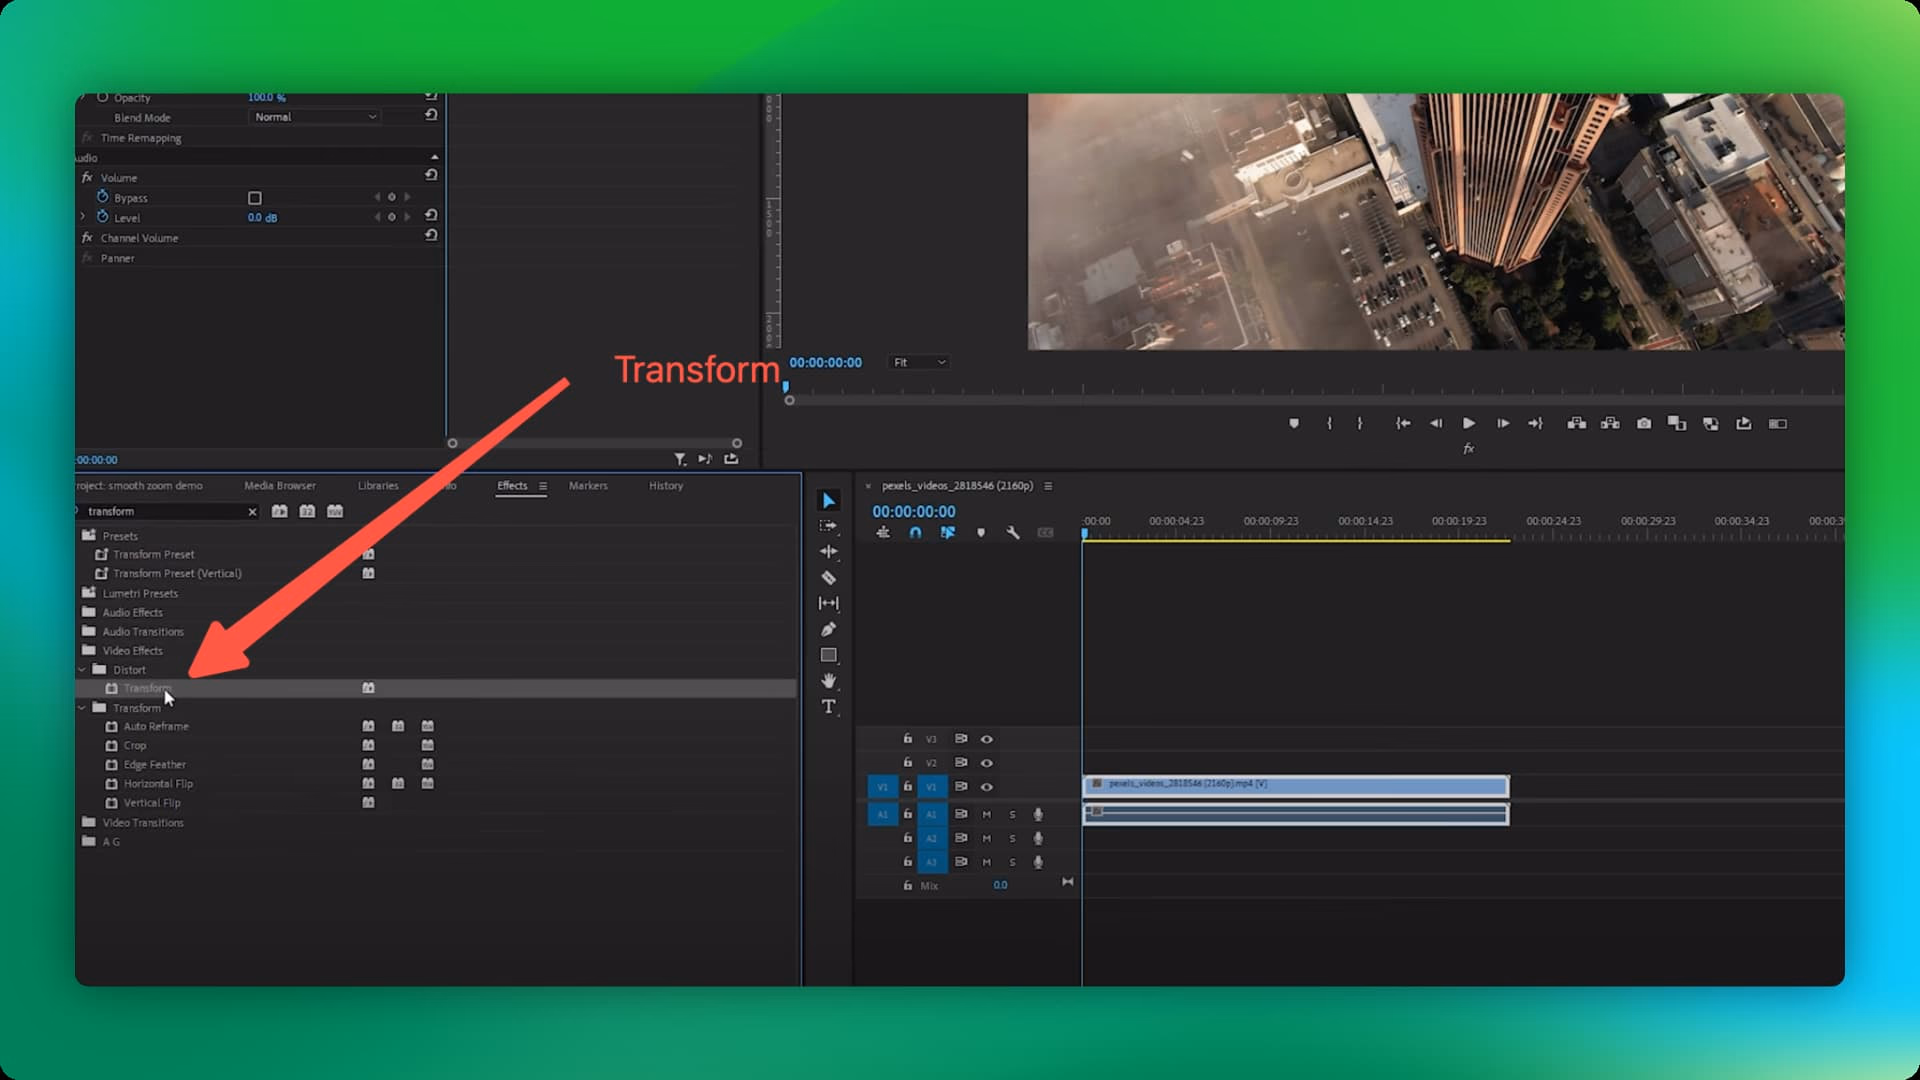 Step 4: Drag and drop the Transform effect onto your clip in the timeline.
Step 5: In the Effect Controls panel, adjust the Scale property to control the zoom level.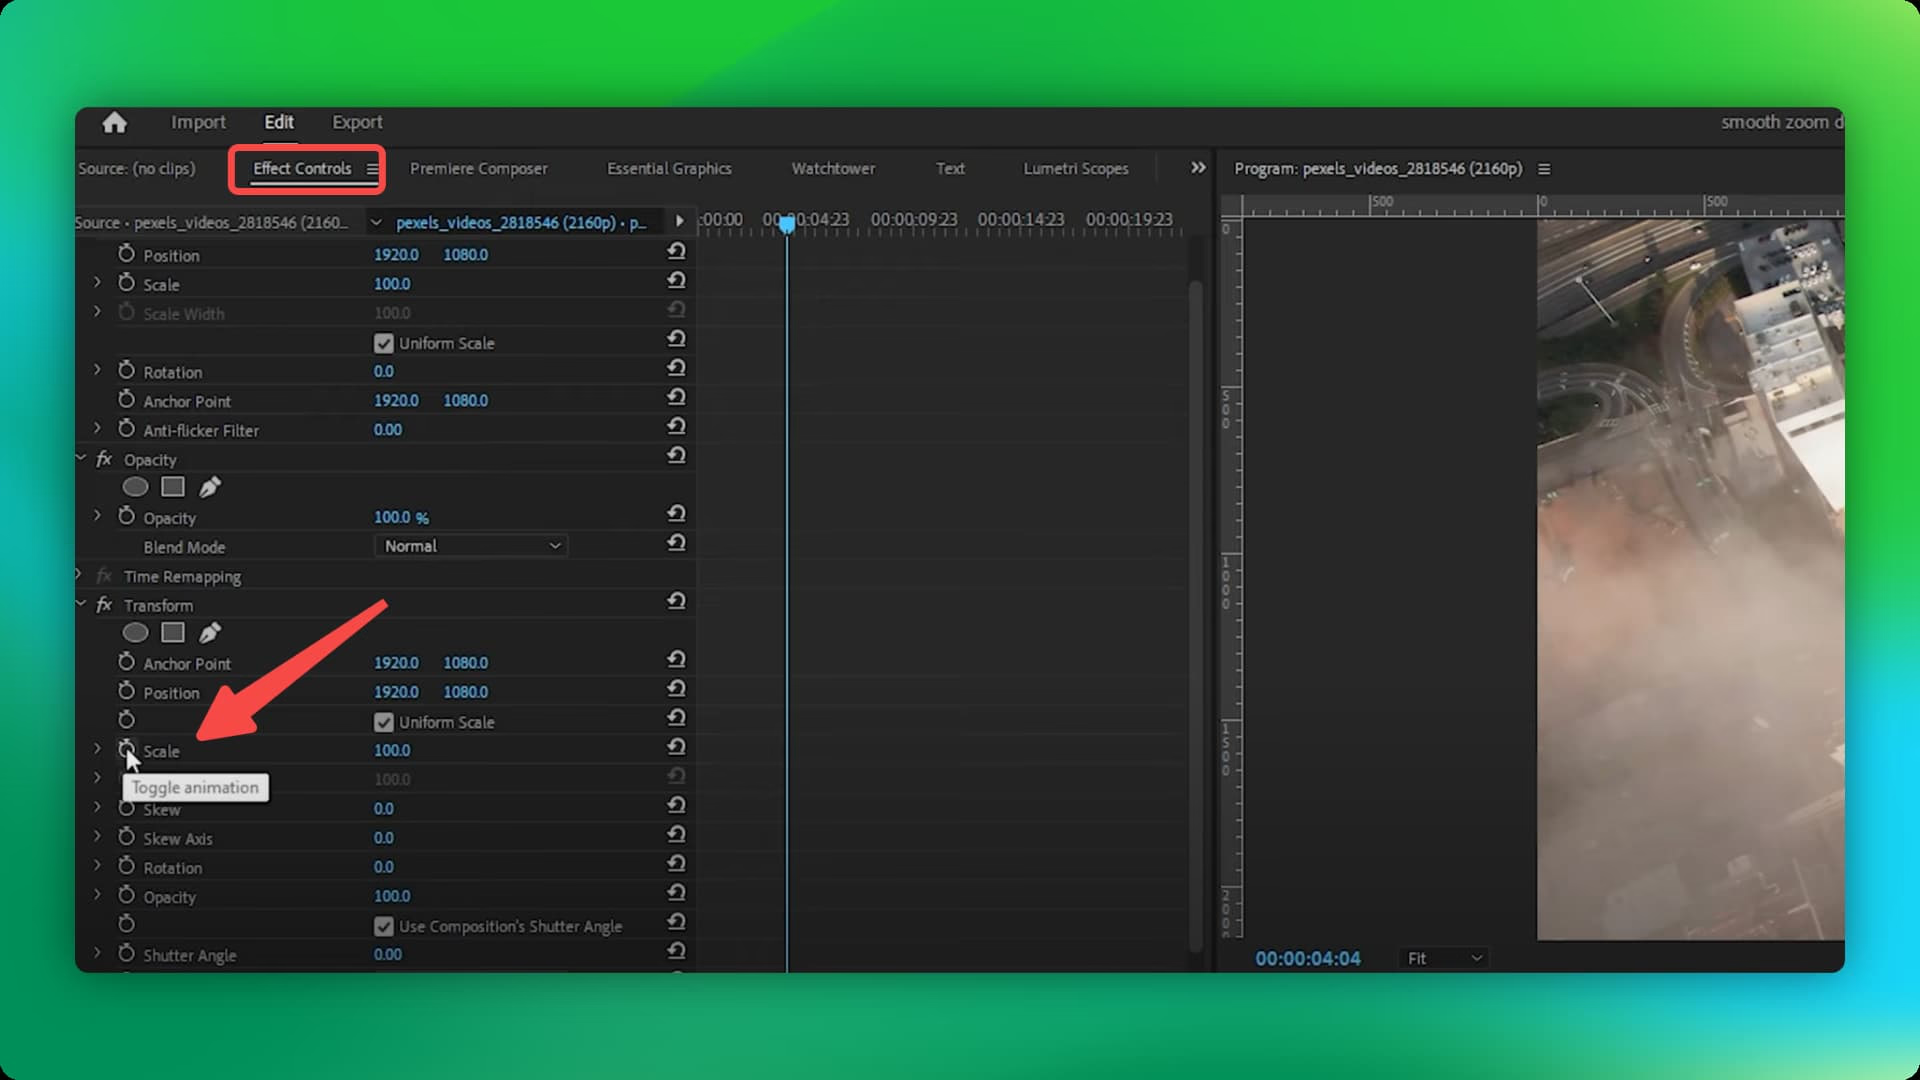 Step 6: Use the Center property to reposition the zoom's focal point.
Video Guide:
Tips:
- Experiment with different interpolation methods (found in the keyframe options) to achieve different zoom speeds and styles.
- Use keyframes to create more complex zoom animations, such as zooming in on one area and then smoothly transitioning to another.
Best for: Precise control over the zoom level and focal point, allowing for creative zoom effects.
Comparison Table: Premiere Pro Zoom Methods
| Feature | Scale Tool | Cropping to Zoom | Transform Tool |
| Ease of Use | Easy | Easy | Moderate |
| Zoom Precision | Moderate | High | High |
| Flexibility | Moderate | Limited | High |
| Additional Features | Limited | Limited | Limited |
Bonus Tip: The Quickest Way to Add Zoom Effects
Premiere Pro is incredibly powerful, but what if your task is simple? What if you just need to animate a static product image or create a quick, perfect zoom on a 5-second screen recording? Setting up keyframes and adjusting easing curves can sometimes feel too slow for such a simple job.
Poindeo is a focused, browser-based animation tool. Its entire purpose is to let you create a perfect pan-and-zoom effect on any video clips or on images/PDFs with maximum speed and minimal effort.
Why Use Poindeo to Zoom?
- One-Click Zoom: Poindeo simplifies the process with its intuitive click-to-zoom feature, eliminating the need to navigate complex menus or settings.
- Versatile File Support: Work seamlessly with videos, images, and PDFs, making Poindeo ideal for diverse content creation needs.
- Beyond Zooming: Enhance your videos further with text overlays, background music, auto-subtitles, and various export options to suit different platforms.
GIF made by Poindeo
How to Zoom in on a Video [Guide]
Expert Tips for Zooming in Premiere Pro
- Less is More: Avoid excessive zooming, which can be distracting and look unprofessional.
- Smooth Transitions: Use keyframes to create gradual zooms that feel natural to the viewer.
- Match the Music: If you're using music, try to time your zooms to the beat for a more engaging experience.
- Consider Context: The best zoom technique will depend on the specific footage and the effect you're trying to achieve.
Common Mistakes to Avoid
- Zooming Too Quickly: This can be jarring for viewers.
- Zooming Too Far: This can lead to pixelation and quality loss.
- Forgetting to Set Keyframes: Without keyframes, your zoom will be a sudden jump, not a smooth transition.
- Ignoring Aspect Ratio: Distorted footage looks unprofessional. Always maintain the correct aspect ratio when zooming.
Troubleshooting
My zoom is choppy or laggy during playback.
Solution: Reduce the playback resolution in Premiere Pro (right-click the Program Monitor > Playback Resolution) or optimize your computer's performance.
My zoom effect is not smooth, even with keyframes.
Solution: Experiment with different keyframe interpolation methods (right-click the keyframe > Temporal Interpolation).
Applying Zoom Techniques
- Cinematic Zoom: Use slow, subtle zooms to create a sense of drama or tension.
- Ken Burns Effect: Combine slow zooms with subtle panning to add visual interest to still images.
- Product Demo: Zoom in on key features of a product during a demonstration.
- Highlight Reactions: In interviews or documentaries, zoom in on a subject's face to emphasize their emotional response.
Conclusion
A smart editor knows how to use the best tool for the job. Poindeo isn't a replacement for Premiere Pro; it's an efficiency tool that can be seamlessly integrated into your Premiere Pro workflow.
Scenario: You are editing a product tutorial in Premiere Pro.
- Create Animated Assets with Poindeo: You need a dynamic opening shot of the product's packaging. Instead of keyframing in Premiere, you open Poindeo, upload a high-resolution product photo, and set up a beautiful zoom from a wide shot to a close-up of the logo. You download the resulting MP4 video.
- Import to Premiere Pro: You drag this newly created MP4 file directly into your Premiere Pro project bin.
- Assemble and Edit: Place this perfectly animated clip at the start of your timeline. Now you can continue with your main edit, using Premiere Pro's advanced features for the rest of your project.
You've just used Poindeo's speed to generate a high-quality asset in seconds, saving you valuable editing time inside your main project.